Comprehensive Handbook for Perfecting Wig Bonding Techniques to Achieve Flawless Results
Understanding the Comprehensive Steps Involved in Wig Bonding
Wig bonding is a meticulous and intricate process that entails securely fastening a wig to the scalp through various adhesives or innovative techniques. This essential method is crucial for achieving a lifelike appearance and ensuring a snug fit, which can significantly enhance the overall aesthetic. When performed correctly, wig bonding creates a seamless transition between the wig and the wearer’s natural hairline, resulting in a more authentic look. Common methods employed in wig bonding include:
- Glue-based bonding
- Tape-based bonding
- Medical-grade adhesives
- Fusion techniques utilizing heat
- Skin-compatible adhesive creams
- Weaving methods
- Clip-in techniques
- Micro-link connections
Grasping these various techniques is vital for individuals aspiring to achieve the best possible results with their wigs. The most suitable bonding method can vary based on factors such as hair type, lifestyle, and personal preferences, making it essential to choose wisely.
Enhancing Wig Bonding Durability: The Advantages of Using Irons
Integrating irons into the wig bonding process can significantly improve the durability and visual quality of the bond. Irons provide a precision and control level that is often necessary to achieve impeccable results. The application of heat can activate specific adhesives, establishing a stronger bond that is less prone to lifting or detaching over time. Key benefits of utilizing irons in wig bonding include:
- Enhanced bond strength
- Increased adhesion through heat activation
- Improved precision during application
- Ability to style the wig while bonding
- Faster setting times for adhesives
- Minimized risk of lifting edges
- Versatility for various wig materials
- Opportunities for a seamless finish
These advantages position irons as an indispensable tool in the wig bonding toolkit, enhancing both the functional and aesthetic aspects of the process.
Essential Safety Precautions When Utilizing Irons in Wig Bonding
Maintaining safety is paramount when using irons for wig bonding, as improper techniques can lead to burns or damage to both the wig and the scalp. It is crucial to adhere to proper practices and precautions to guarantee a secure and successful bonding experience. Important safety guidelines for using irons in wig bonding include:
- Always conduct a patch test with the adhesive on a small area of skin.
- Utilize a heat-resistant mat to safeguard surfaces from burns.
- Adjust the iron to the appropriate temperature based on the adhesive being utilized.
- Keep the iron in motion to avoid creating hotspots during application.
- Wear protective gloves while handling heated tools.
- Ensure the workspace remains clutter-free and devoid of flammable materials.
- Allow the iron to cool completely before storage.
- Apply suitable heat protectant products on wigs to avert damage during the bonding process.
By following these crucial guidelines, the risk of accidents can be significantly minimized, leading to a safer and more enjoyable bonding experience.
Selecting the Ideal Adhesive for Wig Bonding
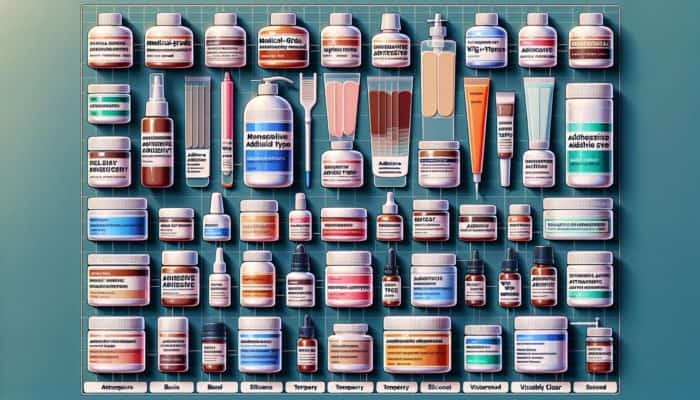
Choosing the right adhesive is a vital component of the wig bonding process. Factors such as skin type, desired hold, and ease of removal must be taken into account to achieve optimal results. Different adhesives provide varying strengths and longevity, making it essential to select one that aligns with the wearer’s lifestyle and preferences. Popular adhesives used in wig bonding include:
- Medical-grade adhesives suitable for sensitive skin
- Waterproof glues designed for extended wear
- Temporary adhesives intended for short-term use
- Bio-based adhesives for environmentally conscious choices
- Silicone-based adhesives for flexibility
- Heat-activated adhesives for seamless bonding
- Clear adhesives for a discreet finish
- Adhesive tapes for straightforward application
Being well-informed about the characteristics of these adhesives can assist users in making educated choices, ultimately leading to superior bonding experiences and outcomes.
Key Maintenance Practices for Long-lasting Bonded Wigs
Proper maintenance is crucial for ensuring both the longevity and visual appeal of bonded wigs. Regular cleaning and appropriate storage techniques are necessary to preserve the integrity of both the wig and the bond. Maintenance recommendations for bonded wigs include:
- Gently cleanse the wig using appropriate products to maintain its excellent condition.
- Avoid excessive heat exposure when styling to prevent damage to the wig.
- Store wigs on a mannequin or in a breathable bag to help maintain their shape.
- Regularly inspect the bond for signs of wear and promptly address any issues.
- Utilize a wide-toothed comb to detangle and minimize breakage.
- Reapply adhesive as needed to ensure the longevity of the bond.
- Keep wigs away from direct sunlight when not in use.
- Use protective sprays to maintain shine and vibrancy over time.
By adhering to these maintenance practices, wearers can significantly extend the lifespan of bonded wigs, allowing for continued enjoyment and enhanced satisfaction.
Proven Techniques for Enhancing Wig Bonding with Irons
How Professionals Optimize Wig Bonding Techniques
Professionals in the wig bonding industry offer invaluable insights into refining bonding techniques, particularly concerning the use of irons. Their extensive experience empowers them to identify the most effective methods and tools available. To enhance wig bonding techniques using irons, consider the following actionable strategies:
1. Conduct Thorough Research: Stay informed about the latest trends and techniques in wig bonding. Online tutorials and professional workshops can provide fresh insights and innovative methods.
2. Experiment with Various Irons: Not all irons are created equal. Testing different models can help determine which one offers the best heat distribution and control for bonding.
3. Refine Application Techniques: Practicing correct motion and timing during iron application can significantly improve adhesion. Experts recommend maintaining a consistent pace for even heat application.
4. Utilize Heat Protectants: Always apply a heat protectant product to the wig before using an iron, safeguarding against damage while enhancing the bond’s effectiveness.
5. Engage with Community Feedback: Join forums or social media groups focused on wig bonding. Sharing experiences can yield practical tips from fellow enthusiasts and professionals.
6. Invest in Quality Tools: Purchasing high-quality irons and adhesives can dramatically influence results. Quality tools often yield more reliable outcomes.
7. Understand Individual Needs: Customizing techniques to suit individual hair types and preferences can lead to more personalized and effective bonding solutions.
By implementing these strategies, wig wearers can refine their bonding practices, resulting in improved durability and aesthetic appeal.
Latest Innovations in Iron Technology for Superior Wig Bonding
The evolution of iron technology has introduced numerous innovations that significantly enhance the wig bonding process. These advancements not only improve efficiency but also prioritize safety and user experience. Some of the latest innovations in iron technology include:
1. Smart Temperature Control: Modern irons feature digital displays that allow for precise temperature settings, ensuring optimal bonding without overheating risks.
2. Rapid Heating Features: Newer models heat up more quickly, reducing wait times and enhancing overall efficiency during the bonding process.
3. Ceramic and Tourmaline Plates: These materials provide even heat distribution, minimizing hotspots and ensuring a consistent bond across the entire surface.
4. Ergonomic Designs: Improved grips and lightweight designs make irons easier to handle, reducing fatigue during prolonged use.
5. Automatic Shut-off Features: Safety mechanisms deactivate the iron after a set period of inactivity, helping to prevent accidents and burns.
6. Multi-functionality: Some irons now offer versatility beyond wig bonding, including options for styling and curling, catering to various hair needs.
7. Wireless Models: Cordless irons provide added convenience and mobility, allowing users to bond wigs anywhere without being tethered to a power source.
These innovations represent significant advancements in the tools available for wig bonding, ensuring a more effective and user-friendly experience.
Real-World Case Studies Demonstrating Successful Wig Bonding with Irons
Real-world examples of successful wig bonding using irons illustrate the effectiveness of various techniques and tools in practice. Consider the following case studies that showcase the practical application and outcomes of refined bonding methods:
1. Professional Stylist Case Study: A renowned stylist conducted a workshop demonstrating the use of heat-activated adhesives with a ceramic iron. Participants noted a 30% increase in bond durability compared to traditional methods, with many reporting enhanced comfort and wearability.
2. Celebrity Influence: A celebrity stylist combined silicone-based adhesive with a digital temperature-controlled iron on a high-profile client’s wig. The outcome was a seamless blend with the client’s natural hairline, showcasing the potential of contemporary techniques in high-stakes environments.
3. Everyday User Experience: An everyday wig wearer documented her journey on social media, showcasing the use of a lightweight iron and heat protectant. The successful bond lasted over three weeks, requiring minimal maintenance, proving effective for those with busy lifestyles.
4. Community Feedback Loop: A local beauty salon implemented a new bonding process using advanced irons and shared their results in a community forum. Clients reported reduced discomfort and longer-lasting wear, leading to increased client satisfaction and retention.
These case studies provide compelling evidence of the effectiveness of refined wig bonding techniques using irons. Each example underscores the importance of selecting the right tools and methods for achieving outstanding results.
Guidelines for Selecting the Ideal Iron for Optimal Wig Bonding
Choosing the right iron for wig bonding is essential to achieving effective results. Several factors should guide this decision, ensuring that the selected tool aligns with specific bonding needs. Key features to consider when selecting the best iron for wig bonding include:
1. Temperature Control: Opt for an iron with adjustable temperature settings to allow for customized heat application based on the adhesive and wig material being used.
2. Plate Material: Select irons with ceramic or tourmaline plates, as these materials provide even heat distribution and help prevent damage to the wig.
3. Weight and Design: A lightweight, ergonomic design can minimize hand fatigue during longer bonding sessions, enhancing comfort and efficiency during use.
4. Safety Features: Look for models that include automatic shut-off functions and other safety mechanisms to prevent accidents during use.
5. Corded vs. Cordless: Consider how mobility impacts your bonding process. Cordless models offer flexibility, while corded ones may provide consistent power without needing recharging.
6. Multi-functionality: Some irons can serve dual purposes for styling and bonding, providing versatility for personal use or professional settings.
7. User Reviews and Recommendations: Research user feedback on specific models to gauge their performance in real-world applications.
By carefully evaluating these factors, users can select an iron that best suits their needs, ensuring a successful wig bonding experience.
Essential Safety Measures for Using Irons in Wig Bonding
Maintaining safety while using irons for wig bonding is essential to prevent accidents and damage to both the wig and the scalp. Practicing the following precautions can help ensure a safe bonding experience:
- Always perform a patch test with new adhesives on a small area of the scalp.
- Utilize a heat-resistant mat or surface to protect work areas from burns.
- Adjust the temperature of the iron based on the specific adhesive and wig type being utilized.
- Keep the iron in motion during application to prevent overheating and damage.
- Wear protective gloves when handling heated tools and products to avoid burns.
- Ensure a clutter-free workspace to minimize the risk of accidents and enhance safety.
- Allow the iron to cool down completely before storing it away to avoid accidental burns.
- Use a heat protectant on wigs prior to applying heat to minimize damage during bonding.
Implementing these safety measures can significantly reduce the risk of injuries and ensure a more successful and enjoyable wig bonding process.
Essential Tools and Equipment for Successful Wig Bonding
Key Tools Required for Effective Wig Bonding
Achieving effective wig bonding necessitates a selection of essential tools that facilitate the entire process. Each tool serves a specific purpose to ensure optimal adhesion and finish. The fundamental tools required for successful wig bonding include:
1. Heat Iron: A high-quality heat iron is crucial for activating adhesives and ensuring strong bonds. Look for one with adjustable temperature settings to cater to different bonding needs.
2. Adhesives: Choose the right adhesive based on skin sensitivity and desired bond duration. Options include medical-grade adhesives and tape that are skin-friendly.
3. Applicators: Applicators, such as brushes or spatulas, allow for precise adhesive application, ensuring even coverage across the bonding area.
4. Comb: A wide-toothed comb is essential for detangling and preparing both the wig and natural hair before bonding, promoting a smoother application process.
5. Heat Protectant Spray: This product is essential for protecting the wig from heat damage during the bonding process, ensuring the integrity of the fibers is maintained.
6. Microfiber Cloth: Useful for cleaning excess adhesive and maintaining a tidy work area during the bonding process, minimizing mess and ensuring clarity.
7. Mannequin Head or Stand: For those applying wigs on themselves, a mannequin head can provide a stable surface for practice and application, facilitating a smoother process.
8. Storage Containers: Keeping wigs and bonding materials in designated containers can prolong their usability and maintain organization, ensuring easy access when needed.
Utilizing these essential tools can significantly enhance the bonding process, resulting in a more professional and polished finish that satisfies the user’s expectations.
How to Choose the Ideal Iron for Wig Bonding?
Selecting the right iron is pivotal for successful wig bonding, as several factors influence performance and outcomes. Here are critical features to consider when selecting an iron for wig bonding:
1. Heat Settings: Look for an iron with adjustable heat settings to accommodate various adhesive types and wig materials, allowing for customization based on specific needs.
2. Plate Material: Irons with ceramic or titanium plates offer even heat distribution, reducing the risk of damaging the wig while ensuring effective bonding.
3. Weight and Balance: Opt for a lightweight design that offers good balance, thus minimizing user fatigue during extended bonding sessions.
4. Cord or Cordless Functionality: Consider your working environment; cordless models offer flexibility, while corded ones provide uninterrupted power to facilitate the bonding process.
5. Quick Heating Feature: An iron that heats quickly can save time and streamline the bonding process, making it more efficient for both professionals and home users.
6. Safety Features: Automatic shut-off functions are essential for preventing accidents, especially during long bonding sessions where the iron may be left unattended.
7. User Reviews: Research customer feedback and professional recommendations to gauge the performance and reliability of specific models, ensuring informed decisions.
By evaluating these factors, users can confidently select an iron that meets their specific bonding needs, ultimately enhancing their wig bonding results and experience.
Necessary Maintenance for Bonding Equipment
Proper maintenance of bonding equipment is vital for ensuring longevity and effectiveness in the wig bonding process. Regular care can prevent damage and enhance performance over time. Here are some crucial points regarding the maintenance and care of bonding equipment:
1. Regular Cleaning: Clean irons and applicators after each use to prevent adhesive build-up. Use gentle cleaners compatible with the materials to ensure longevity.
2. Storage Considerations: Store bonding equipment in a cool, dry place to prevent damage from humidity or heat. Use protective covers for iron plates when not in use to maintain their quality.
3. Inspect Equipment: Regularly check tools for signs of wear or damage. Replace any worn-out parts, such as frayed cords on irons, to ensure safety and efficiency in use.
4. Frequency of Maintenance: Conduct a thorough cleaning and inspection of your tools at least once a month, or more frequently if used regularly, to maintain optimal performance.
5. Follow Manufacturer Instructions: Adhere to the manufacturer’s care guidelines for each tool to maximize longevity and maintain optimal performance throughout their usage.
6. Use Appropriate Products: Ensure that cleaning products are suitable for the specific materials of your equipment, as harsh chemicals can cause damage and reduce their longevity.
Implementing these maintenance practices can significantly extend the lifespan and effectiveness of bonding equipment, ensuring consistent results in wig bonding procedures over time.
Step-by-Step Approach to Optimizing Wig Bonding with Irons
Preparing the Wig and Scalp for Successful Bonding
Preparation is key to achieving a successful wig bonding process. Properly preparing both the wig and the scalp ensures a solid foundation for adhesion. To effectively prepare the wig and scalp, follow these detailed steps:
1. Clean the Scalp: Begin by washing the scalp with a gentle cleanser to remove oils, dirt, and product build-up. This step is vital for optimal adhesive performance and longevity.
2. Dry Thoroughly: Ensure that the scalp is completely dry before applying any adhesive. Moisture can compromise the bond and lead to premature lifting, undermining the efficacy of the bonding process.
3. Prepare the Wig: Gently cleanse the wig with a suitable wig shampoo and allow it to dry thoroughly. This helps eliminate any styling products that may interfere with the bonding process.
4. Style the Wig: If desired, style the wig before bonding. This allows for easier adjustments and less manipulation once it is adhered to the scalp, ensuring a better fit.
5. Check Fit: Prior to applying adhesive, position the wig on the head to check for fit and make any necessary adjustments to ensure it sits correctly.
6. Apply Heat Protectant: Spray a heat protectant on the wig to shield it from potential damage during the bonding process, especially if heat is involved in the application.
7. Gather Tools: Have all necessary tools, including the iron, adhesive, applicators, and combs, within reach to facilitate an efficient bonding process, minimizing disruptions.
Taking these preparatory steps can lead to a more successful and visually appealing wig bonding outcome, ensuring that everything is in place for optimal adhesion and wearability.
Best Practices for Applying the Iron to Achieve Optimal Bonding Results
Applying the iron correctly is vital for ensuring a strong and durable bond. The technique and timing involved in this process can significantly affect the effectiveness of the bonding. Here are best practices for applying the iron during bonding:
1. Set the Right Temperature: Ensure the iron is set to the appropriate temperature based on the adhesive being used and the wig material. Start with a lower temperature if unsure to avoid damage.
2. Section the Wig: Divide the wig into manageable sections for even application. This allows for precise heat distribution and enhances the bonding process while providing a more uniform result.
3. Consistent Motion: Apply the iron in smooth, consistent motions across the adhesive area. Avoid holding it in one spot for too long to prevent overheating and damaging the wig or adhesive.
4. Timing is Key: Follow the adhesive manufacturer's recommendations for how long to apply heat. Typically, 10-30 seconds is sufficient to activate most adhesives effectively.
5. Monitor Bonding Progress: After applying heat, gently check the bond by lifting a small section. If it lifts easily, reapply the heat and adhesive as necessary to ensure a secure bond.
6. Seal the Edges: Once the bond is set, use the iron to seal the edges of the wig for a more polished and natural appearance, smoothing any lifted sections to enhance the overall look.
7. Cool Down Period: Allow the bond to cool completely before manipulating or styling the wig further. This helps solidify the bond and ensures longevity, making the bond more secure.
Implementing these techniques can significantly enhance the success of wig bonding, leading to a more durable and aesthetically pleasing finish that meets the wearer’s expectations.
Final Steps for Effectively Finishing and Securing the Bond
Finishing touches during the wig bonding process can greatly enhance the bond's appearance and durability. Properly securing the bond ensures it remains intact and looks natural over time. To finish and secure the bond effectively, consider the following steps:
1. Inspect the Bond: Thoroughly check the bond for any areas needing additional adhesive or heat. This step ensures a uniform hold across the entire wig, enhancing its longevity.
2. Seal Edges with Iron: Use the iron to gently press down the edges of the wig, ensuring they adhere well to the scalp. This technique helps prevent lifting and creates a seamless look, contributing to the bond’s overall effectiveness.
3. Apply Finishing Products: Once the bond is secure, apply a light finishing spray or serum to enhance shine and protect the wig from environmental factors that may cause wear over time.
4. Secure with Clips: If necessary, use wig clips or bands to temporarily secure the wig while the adhesive fully sets. This added support can prevent any movement until the bond is completely cured.
5. Check for Comfort: After securing the bond, ensure the wig feels comfortable and doesn’t irritate the scalp. Make adjustments as necessary to achieve a perfect fit that is both secure and pleasant.
6. Allow Time to Set: Give the bond time to cure fully before styling or engaging in strenuous activities. This ensures the adhesive reaches its maximum holding capacity, enhancing the bond’s longevity.
7. Regular Maintenance Checks: After the bonding process, schedule regular maintenance checks to assess the integrity of the bond and address any issues promptly to prolong the life of the wig.
By completing these finishing steps, the bond can achieve a polished, natural look, ensuring that the wig remains securely in place and comfortable for the wearer throughout its use.
Addressing Common Challenges in Wig Bonding and Solutions
How to Correct Issues with Uneven Bonding for a Seamless Look
Uneven bonding can lead to an unnatural appearance and discomfort for the wearer. Identifying and addressing the causes of uneven bonding is essential for improving the outcome. Common causes of uneven bonding and potential solutions include:
1. Inconsistent Adhesive Application: Ensure that adhesive is applied evenly across the bonding area. Using a suitable applicator can help achieve uniform coverage, enhancing the bond’s effectiveness.
2. Improper Heat Distribution: If the iron is too hot in certain areas, it can cause irregular bonding. Regularly check and adjust the temperature settings to ensure even heat application across the entire area.
3. Insufficient Heating Time: If the adhesive doesn’t receive adequate heat, it may not bond properly. Follow manufacturer guidelines for heating times to ensure a secure hold that lasts.
4. Inadequate Preparation: Preparing the scalp and wig correctly is crucial. Clean thoroughly and dry completely before bonding to prevent uneven adhesion that can affect the overall look.
5. Lifting Edges: If edges lift, it can create an uneven look. Use the iron to seal edges securely, ensuring a smooth transition between the wig and natural hairline.
6. Poor Wig Fit: A poorly fitted wig can lead to visible gaps and uneven bonding. Always assess fit before bonding and make any necessary adjustments for a snug fit that provides comfort.
7. Regular Maintenance Checks: Schedule periodic checks to address any issues with bonding as they arise. Early intervention can prevent further complications and maintain the integrity of the bond.
By recognizing these potential challenges and implementing appropriate solutions, wearers can achieve a more uniform and natural-looking bond that enhances their overall appearance and comfort.
Strategies to Prevent Heat Damage During the Bonding Process
Heat damage during the bonding process can adversely affect both the wig and the scalp. Proper techniques and tools can significantly mitigate this risk. Here are strategies to prevent heat damage during bonding:
1. Use Heat Protectants: Always apply a heat protectant spray to the wig before using the iron. This product creates a barrier against heat, reducing potential damage to the wig’s fibers.
2. Monitor Temperature Settings: Set the iron to the lowest effective temperature for the adhesive being used. This precaution helps minimize the risk of overheating and damaging the wig.
3. Limit Direct Heat Exposure: Keep the iron moving to avoid concentrating heat on a single spot. This technique prevents hotspots that can damage hair fibers and affect the wig’s appearance.
4. Incorporate Cooling Breaks: Allow the wig to cool down briefly between bonding sessions. This practice can prevent cumulative heat damage from extended use and maintain the integrity of the wig.
5. Invest in High-Quality Tools: Use professional-grade irons designed for wig bonding. Quality tools typically offer better temperature control and heat distribution, minimizing risks during application.
6. Regularly Inspect the Wig: After bonding, regularly check the wig for any signs of heat damage, such as frizz or texture change. Address issues promptly to maintain the wig's integrity and appearance.
7. Educate on Proper Techniques: Take the time to learn the correct application methods for both the adhesive and iron. Understanding the process can greatly reduce the risk of damage and enhance results.
Implementing these strategies can protect both the wig and the wearer's scalp, ensuring a successful bonding experience without compromising the quality of the materials used.
Steps to Take If the Bond Fails: A Proactive Approach
Experiencing bond failure can be frustrating, but understanding the reasons behind it can help prevent future occurrences. Here are steps to take if the bond fails:
1. Assess the Cause of Failure: Determine whether the failure was due to improper application, insufficient preparation, or unsuitable adhesive choice. Identifying the reason can guide corrective actions for future bonding.
2. Remove the Failed Bond Safely: Use a gentle adhesive remover to carefully detach the wig from the scalp. Avoid pulling or tugging to prevent damage to the natural hair beneath.
3. Clean the Scalp: Once the bond is removed, cleanse the scalp thoroughly to eliminate any residual adhesive, dirt, or oil that may affect future bonding efforts.
4. Reevaluate Your Method: Consider adjusting your bonding technique. Experimenting with different adhesives or tools if the initial method was not effective can lead to improved results.
5. Test Adhesives: If using a new adhesive, conduct a patch test on a small area of the scalp to evaluate sensitivity and bonding capability before full application.
6. Allow Adequate Drying Time: Ensure all products applied are given sufficient time to set before attempting to bond the wig again. This can help prevent future failures and ensure proper adhesion.
7. Seek Professional Advice: If bond failures persist, consult a professional stylist who specializes in wig bonding. Their expertise can provide tailored solutions and techniques for successful bonding.
By addressing bond failure proactively, individuals can improve their bonding experience and achieve more reliable results in subsequent applications.
Considerations for Proper Bonding on Different Hair Types
Different hair types require specific bonding techniques to ensure effective and aesthetic results. Understanding these differences can lead to better bonding experiences. Here are strategies for adapting bonding methods for various hair types:
1. Fine Hair: Fine hair often requires gentler adhesives and lower heat settings to prevent damage. Use lightweight adhesives to avoid weighing down the hair during bonding.
2. Curly Hair: For curly hair, consider using flexible adhesives that allow for movement without compromising hold. This prevents breakage and maintains the integrity of the curls during wear.
3. Thick Hair: Individuals with thick hair may benefit from stronger adhesives and higher heat settings. Ensure thorough bonding to accommodate the density of the hair for optimal results.
4. Textured Hair: Textured hair types might require additional moisture and care. Use bonding methods that account for hair health, applying products that promote shine and hydration during the process.
5. Short Hair: Short hair can present challenges with bonding. Consider using clips or tapes in conjunction with adhesives to ensure a secure fit without affecting the natural look.
6. Natural Hair vs. Relaxed Hair: Adjust bonding techniques based on whether the hair is in its natural state or relaxed. Natural hair may require more careful handling to prevent damage during application.
7. Consulting a Professional: For those unsure about the best bonding methods for their hair type, consulting a professional stylist can provide tailored advice and techniques for effective bonding.
By recognizing and adapting to the unique needs of different hair types, individuals can achieve optimal bonding results that enhance both appearance and comfort.
Research-Backed Advantages of Optimizing Wig Bonding with Irons
Studies Indicating the Longevity of Bonds Created with Irons
Research has demonstrated that bonds formed with irons can be more durable than those created with alternative methods. This durability is crucial for individuals seeking longevity in their wig applications. Expert analysis shows that the heat activated by irons tends to forge a stronger chemical bond between the adhesive and both the wig material and the scalp. This stronger bond can lead to longer-lasting results, significantly reducing the frequency with which a bond must be reapplied.
Furthermore, studies suggest that consistent heat application contributes to a more uniform bond. Irons that maintain a steady temperature help to minimize thermal damage while enhancing adhesion. This means that not only are bonds created with irons often more resilient, but they also maintain the integrity of the wig and natural hair, leading to a more comfortable wear experience overall.
The potential for longer-lasting results is paramount for consumers who invest in high-quality wigs, ensuring that their appearance remains polished and professional over extended periods without frequent maintenance.
Impact of Refining Wig Bonding Techniques on Appearance
Refining wig bonding techniques with irons can significantly enhance the overall appearance of wigs, allowing for a natural and seamless look. When executed correctly, the heat application can activate adhesives effectively, creating a smooth transition from the scalp to the wig.
To achieve a natural appearance, individuals should focus on the precision of their application. The use of irons can help to shape the wig along the contours of the wearer’s head, ensuring that it hugs the natural hairline closely. This attention to detail can eliminate noticeable gaps or unevenness, which are often the tell-tale signs of poorly bonded wigs.
Moreover, the application of heat can also enhance the overall texture and shine of the wig. By carefully applying heat during the bonding process, the fibers of the wig can maintain their natural luster, further contributing to an authentic look. For optimal results, individuals should integrate techniques that promote this seamless appearance, such as using heat protectants and ensuring that they are working with high-quality materials.
Ultimately, refining the bonding process with irons can elevate the overall wearer’s experience, providing confidence and comfort while enhancing aesthetic appeal.
Long-Term Advantages of Utilizing Irons in Wig Bonding
The long-term benefits of using irons in the wig bonding process are multifaceted, enhancing both the durability and ease of maintenance for wigs. By focusing on refining bonding techniques, wearers can enjoy several advantages, including:
1. Increased Durability: Bonds created with irons tend to last longer, reducing the need for frequent reapplications. This can save time and resources for the wearer, making wig maintenance more manageable and efficient.
2. Improved Aesthetics: A well-executed bond appears natural and seamless, significantly boosting the wearer’s confidence and overall satisfaction with their appearance.
3. Reduced Damage: When used correctly, irons can minimize damage to both the wig and natural hair, as they provide consistent heat application and control, preventing overheating that can lead to breakage.
4. Enhanced Comfort: A securely bonded wig is less likely to shift or cause discomfort, allowing wearers to engage in daily activities without worry about their wig moving out of place.
5. Flexibility in Styling: Stronger bonds facilitate styling versatility, allowing wearers to experiment with different looks without compromising the integrity of the bond.
6. Cost-Effectiveness: Investing in quality tools and refining bonding techniques can lead to a longer lifespan for both the wig and the bond itself, providing better value for money in the long run.
7. Environmental Considerations: The ability to reuse wigs due to durable bonding reduces waste and promotes sustainability in the wig-wearing community, contributing positively to the environment.
These long-term benefits underscore the importance of utilizing irons in the wig bonding process, positioning them as indispensable tools for both everyday users and professionals alike.
Advanced Strategies for Optimizing Wig Bonding with Irons
Layering Techniques for Superior Wig Bonding
Layering techniques can significantly improve the strength and appearance of wig bonding. By employing multiple layers of adhesive and utilizing heat correctly, wearers can achieve a more robust bond that withstands the test of time. Here are effective layering techniques for enhanced wig bonding:
1. Apply Multiple Adhesive Layers: Start with a thin layer of adhesive and allow it to become tacky before applying a second layer. This method can create a stronger bond as each layer adds additional support to the overall structure.
2. Use a Heat Iron Between Layers: After applying each layer, use the iron to activate the adhesive. This step ensures that each layer adheres properly and maximizes the overall strength of the bond for lasting results.
3. Incorporate Different Adhesives: Experimenting with various types of adhesives can improve bonding. For instance, using a medical-grade adhesive as a base layer and a stronger bond on top can yield excellent results and enhance security.
4. Focus on Edge Sealing: Pay special attention to the edges of the wig during layering. Ensuring that the edges are well-sealed can provide a more polished and natural-looking finish, preventing any visible gaps.
5. Monitor Consistency: While layering, it’s crucial to maintain consistency in application. Uneven layers can lead to weak points in the bond, causing lifting or detachment that can compromise the overall look.
6. Allow Time for Each Layer: Patience is key. Allowing each layer to set and bind properly before applying the next can enhance the overall effectiveness of the bonding process and ensure durability.
7. Regularly Check for Lift: After bonding, periodically check for any signs of lifting or weakness. Addressing these issues early can prevent larger problems in the future and maintain the integrity of the bond.
By utilizing these layering techniques, individuals can achieve enhanced bonding results, creating a secure and aesthetically pleasing wig application that meets their expectations.
Customizing Bonding Techniques for Different Wig Types
Customizing bonding techniques for different wig types is essential for achieving optimal results. Each wig type may have unique characteristics that require tailored approaches to bonding. Here are best practices for bonding various wig types effectively:
1. Lace Front Wigs: For lace front wigs, incorporate a gentle adhesive that is safe for the delicate lace material. Ensure that the adhesive is applied only to the lace for a seamless blend with the scalp, enhancing the overall appearance.
2. Full Lace Wigs: Full lace wigs benefit from a more extensive bonding area. Apply adhesive evenly across the entire lace, using a gentle touch to avoid damaging the material while ensuring a secure bond.
3. Synthetic Wigs: Synthetic wigs often require lower temperature settings due to their heat sensitivity. Use heat-activated adhesives sparingly to avoid melting the fibers and compromising the wig structure.
4. Human Hair Wigs: Human hair wigs can endure higher temperatures; thus, stronger adhesives can be utilized. Ensure that the bonding process incorporates the natural hair characteristics for the best results.
5. Clip-In Wigs: For clip-in and temporary wigs, consider using adhesive tapes instead of permanent glue. This allows for easy removal and reattachment while maintaining the integrity of the wig.
6. Wigs with Bangs: Wigs with bangs may require special attention at the front hairline. Ensure that the adhesive is applied precisely to prevent any visibility of the bond during wear.
7. Specialty Wigs: Custom or specialty wigs may have specific bonding requirements based on their construction. Consult with the manufacturer or a professional stylist for tailored advice and guidance.
By customizing bonding methods according to the specific wig type, wearers can ensure a secure and natural-looking application, maximizing the benefits of their chosen wigs.
Integrating Other Bonding Methods with Irons for Enhanced Results
Combining irons with other bonding methods can enhance the overall process, resulting in a more versatile and effective bonding experience. Here are strategies for integrating other bonding methods with irons:
1. Attach with Tapes: Use adhesive tapes for initial attachment to secure the wig before applying heat with the iron. This dual method can provide immediate hold while enhancing the bond’s overall strength.
2. Combine Clips and Adhesives: Use clips to hold the wig in place while the adhesive cures. This technique prevents movement and ensures a secure application that enhances the overall results.
3. Utilize Fusion Methods: Integrate fusion techniques, where heat is applied to create a bond, alongside traditional adhesive methods. This approach can enhance the overall strength and longevity of the bond.
4. Incorporate Weaving Techniques: For those who prefer a more permanent solution, integrating weaving methods can provide additional support to the wig. This hybrid approach ensures a fuller look while securing the wig effectively.
5. Layering Products: Combine different types of adhesives in a layering approach, applying heat with the iron to activate each layer. This can enhance durability and flexibility in the bond while providing a secure hold.
6. Use of Finishing Sprays: After bonding, apply finishing sprays that are compatible with both adhesive and heat methods. This can help to seal the bond and add shine, enhancing the overall appearance.
7. Experimentation and Adjustment: Remain open to experimentation. Each integration method may yield different results based on individual needs and preferences, allowing for personalized solutions.
By creatively integrating different bonding methods with the use of irons, wearers can achieve a more robust and aesthetically pleasing bond, significantly enhancing their wig-wearing experience.
Maintaining and Removing Wig Bonds Created with Irons
Daily Care Required for Wig Bonds to Ensure Longevity
Daily care is essential for maintaining wig bonds created with irons, as proper routines can extend the life of the bond and keep the wig looking fresh. Here are recommended daily care routines for wig bonds:
1. Gently Clean the Bond Area: Use a mild cleanser around the bond area to prevent buildup from products or oils, ensuring the bond remains intact and effective over time.
2. Monitor Wig Positioning: Regularly check the wig’s positioning and bond integrity throughout the day. Adjust as necessary to maintain comfort and appearance, ensuring the wig stays in place.
3. Avoid Excessive Heat Styling: Limit the use of heat styling tools on bonded wigs to prevent damage. If styling is necessary, always apply a heat protectant to safeguard the wig.
4. Use a Wide-Tooth Comb: Gently detangle the wig with a wide-toothed comb to prevent breakage and maintain the overall health of the fibers, promoting longevity.
5. Apply a Light Conditioning Spray: Use a light conditioning spray to maintain moisture without weighing down the wig. This helps to keep both the wig and bond in optimal condition.
6. Store Properly at Night: Before bed, secure the wig gently or remove it if possible. Store it in a breathable bag or on a mannequin to maintain its shape and prevent tangling or damage.
7. Regular Refreshing: Refresh the bond with additional adhesive as needed, especially if signs of lifting or discomfort arise, ensuring the bond stays secure and effective.
Implementing these daily care routines can significantly enhance the longevity and appearance of wig bonds, ensuring a consistent and comfortable wear experience for the user.
Safest Methods for Removing Wig Bonds Created with Irons
Safely removing wig bonds created with irons is crucial for preventing damage to both the wig and the scalp. Specific techniques and products can facilitate this process effectively. Here are the safest methods for removing wig bonds:
1. Use an Adhesive Remover: Invest in a quality adhesive remover specifically designed for wig bonds. These products are formulated to dissolve adhesives without damaging the wig or scalp during removal.
2. Apply Remover Generously: Saturate the bond area with the adhesive remover, allowing it to penetrate the adhesive for a few minutes to soften the bond for easier removal.
3. Gently Peel the Wig: After the adhesive has softened, gently peel the wig away from the scalp. Avoid pulling or tugging at the wig to prevent injury to the natural hair beneath.
4. Clean the Scalp: Once the wig is removed, cleanse the scalp thoroughly with a gentle shampoo to remove any residual adhesive or product, promoting a healthy scalp environment.
5. Wash the Wig: Clean the wig with suitable products to eliminate any adhesive traces. This step is vital for maintaining the wig's integrity and appearance for future use.
6. Inspect for Damage: After removal, check both the scalp and wig for any signs of damage. Address any issues promptly to ensure a safe reapplication in the future.
7. Allow Time to Heal: If the scalp appears sensitive or irritated after bond removal, allow it to heal before attempting to re-bond. Proper care during this period is essential for scalp health.
By following these methods, individuals can safely remove wig bonds without compromising the quality of the wig or the health of the scalp, ensuring a smooth transition to re-bonding if desired.
Effective Techniques for Re-bonding and Reusing Wigs
Re-bonding and reusing wigs can be a cost-effective and environmentally friendly approach to wig maintenance. Proper techniques can ensure successful re-bonding, allowing for extended use of the wig. Here’s how to effectively re-bond and reuse wigs that were initially bonded with irons:
1. Assess the Wig’s Condition: Before re-bonding, inspect the wig for any signs of wear or damage. Address any issues before proceeding with the bond to ensure a successful application.
2. Clean the Bond Area: Thoroughly cleanse both the scalp and bond area of the wig to remove any residual adhesive, oils, or products. This ensures a clean surface for the new bond, enhancing adhesion.
3. Choose the Right Adhesive: Select an adhesive suitable for the specific wig type and the bonding method previously used. Consider factors such as skin sensitivity, desired hold, and bond duration.
4. Follow Original Bonding Techniques: Reapply the adhesive using the same methods as the initial bonding. This consistency can help achieve similar results in terms of durability and appearance.
5. Utilize the Iron Again: Use the iron to activate the adhesive as per the original bonding process, ensuring that the bond is secure and long-lasting through proper application of heat.
6. Allow the Bond to Cure: After re-bonding, allow sufficient time for the adhesive to set before engaging in activities that may stress the bond, giving it the best chance for success.
7. Store with Care: After removal and re-bonding, store the wig properly to maintain its shape and quality, ensuring it’s ready for future use while preventing tangling or damage.
By employing these techniques, individuals can successfully re-bond and reuse their wigs, promoting sustainability and maximizing their investment in quality wig products for prolonged enjoyment.
Frequently Asked Questions Regarding Wig Bonding Techniques
What is wig bonding?
Wig bonding is the process of securely attaching a wig to the scalp using various adhesives, ensuring a natural look and fit that enhances the overall appearance.
What advantages does using irons in wig bonding provide?
Using irons enhances bond durability, provides precision in the application, and allows for styling during the bonding process, resulting in a more polished finish.
Are there safety precautions to consider when using irons for wig bonding?
Yes, safety precautions include adjusting the iron to the correct temperature, using heat protectants, and monitoring the bonding area to prevent burns and damage during application.
How do I choose the right adhesive for wig bonding?
Choose an adhesive based on skin type, desired hold, and ease of removal. Popular options include medical-grade adhesives, silicone-based products, and waterproof glues designed for extended wear.
What maintenance is needed for bonded wigs?
Regular cleaning and proper storage are essential for maintaining bonded wigs. Use a gentle cleanser to keep the bond area clean and store the wig in a breathable container to preserve its shape.
How can I improve bonding techniques with irons?
Improving techniques involves staying updated with trends, experimenting with different irons, and refining the application methods used for optimal results and durability.
What innovations are available in iron technology for wig bonding?
Recent innovations include smart temperature control, rapid heating features, and ceramic plates for better heat distribution, all contributing to a more effective bonding process.
What should I do if the bond fails?
Assess the cause of failure, safely remove the wig, clean the area thoroughly, and reevaluate your bonding methods to ensure a successful re-bonding process in the future.
How can I ensure proper bonding on different hair types?
Adapt bonding techniques based on hair type by using suitable adhesives, adjusting heat settings, and considering individual hair characteristics to prevent damage and optimize results.
What are the long-term benefits of using irons in wig bonding?
Long-term benefits include increased durability, improved aesthetics, reduced damage, and cost-effectiveness, leading to a better overall wig-wearing experience and satisfaction.
Connect with us on Facebook!
The Article: Refining Wig Bonding With Irons: Universal Techniques appeared first on Amitys Hair Salon.
The Article Wig Bonding Techniques: Universal Tips for Refinement Was Found On https://limitsofstrategy.com
No responses yet