Essential Steps to Perfectly Optimize Your Pizza Stone for Impressive Results
Thoroughly Cleaning Your Pizza Stone for Optimal Cooking Performance
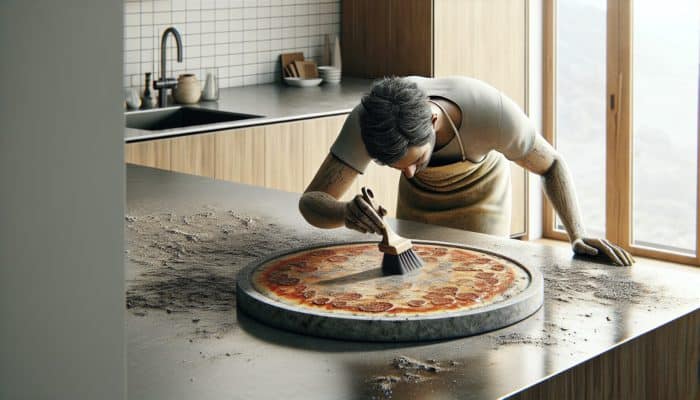
To truly unlock the full potential of your pizza stone, it is essential to begin with a meticulous cleaning process. This fundamental step is crucial for creating that perfect crispy crust and flavorful base you desire. Initiate your cleaning by using a dry brush to gently sweep away any leftover debris from previous baking sessions. This straightforward yet effective method not only removes burnt bits but also protects the stone’s surface, preparing it for your upcoming culinary masterpieces with confidence.
Avoid the temptation to use soap and water, as the porous composition of the stone can absorb these substances, potentially altering the delightful flavors of your pizza. Emphasize the natural properties of the stone for its upkeep. Regularly employing a soft brush or dry cloth will keep your pizza stone in pristine condition, ensuring it is always ready for crafting the culinary delight you envision.
In cases where stubborn stains remain, carefully utilize a spatula or scraper to remove them without risking damage to the stone’s surface. This approach preserves the stone’s longevity while preparing it for your next baking venture. By establishing a consistent cleaning routine, you not only enhance the flavor of your pizza but also significantly extend the life of your stone, making it an invaluable asset in your kitchen toolkit.
Effectively Preheating Your Oven for Consistent Pizza Cooking Success
Preheating your oven is a critical step in mastering the successful use of a pizza stone at home. For the best results, place your pizza stone in a cold oven and set the temperature between 230 °C and 260 °C. This technique ensures that the stone heats uniformly from the center outward, minimizing the risk of thermal shock that can occur when a cold stone is placed in a hot oven. The gradual rise in temperature allows the stone to absorb and retain heat effectively, which is vital for achieving the restaurant-quality crust you crave.
The significance of reaching the correct temperature cannot be overstated. A well-preheated pizza stone provides an immediate burst of heat, which contributes to a wonderfully crisp base while locking in moisture and flavors from the toppings. Allow the stone to remain in the oven for about 30 to 45 minutes to ensure the high temperature necessary for perfect cooking is maintained throughout.
To refine this process further, consider using an oven thermometer to ensure your oven reaches the desired temperature accurately. This meticulous attention to detail can be the difference between a good pizza and an extraordinary one, amplifying the enjoyment and satisfaction derived from your homemade culinary creations.
Strategically Positioning Your Pizza Stone in the Oven for Uniform Cooking
The placement of your pizza stone within the oven is essential for optimal cooking results. For the best experience when learning to use a pizza stone at home, position the stone on the middle rack of your oven. This strategic arrangement promotes even heat distribution, ensuring that both the top and bottom of the pizza cook uniformly.
Positioning the stone too close to the heat source at the bottom of the oven may risk burning the base while leaving the toppings undercooked. Conversely, placing the stone too high can lead to a soggy base as the heat primarily comes from above. By centering the stone, you create a balanced environment that allows your pizza to thrive.
Furthermore, avoid overcrowding the oven. If you plan to cook multiple pizzas, ensure there is sufficient space between them to allow for proper airflow. This promotes even cooking and prevents any unwanted steaming effects. Mastering the art of positioning will set the stage for a delightful pizza experience that transports your taste buds on a global culinary journey.
Crafting the Perfect Pizza Dough for Exceptional Homemade Pizzas
Selecting the Best Flour for Crafting Your Pizza Dough
The cornerstone of any outstanding pizza lies in its dough, making the choice of flour a critical aspect of this equation. When learning how to use a pizza stone at home, selecting high-protein flour, such as bread flour or ‘00’ flour, can significantly enhance your pizza-making prowess. High-protein flours create strong gluten structures, resulting in a chewy and crisp crust that can support a wide array of toppings.
The distinct properties of ‘00’ flour, often used in traditional Italian pizzerias, lend an incredibly smooth texture that is ideal for creating an authentic Neapolitan-style base. This finely milled flour effectively absorbs moisture, improving the extensibility of the dough while providing that desired airy texture. If you wish to experiment with different styles, consider blending various flours to create a crust that aligns with your personal taste preferences.
Incorporating additional flour types, such as whole wheat or rye, can introduce deeper flavors and nutritional benefits to your pizza dough. However, balancing these with higher-gluten flours is essential to maintain the structural integrity of the dough. The choice of flour may also depend on regional preferences, with certain cultures favoring specific grains or blends that highlight their culinary heritage. Understanding these subtleties can greatly enrich your pizza-making journey, making it even more rewarding.
Mixing and Kneading Your Dough for Optimal Texture
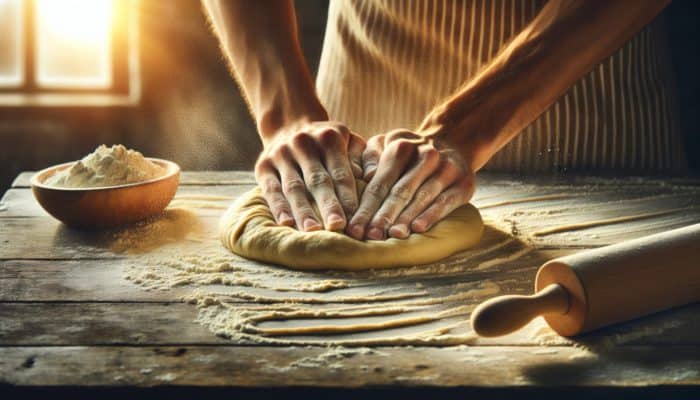
Creating the perfect pizza dough begins with the right blend of ingredients and technique. Start by combining your selected flour with yeast, water, and salt, ensuring that the water is lukewarm to effectively activate the yeast. The ratio of ingredients is crucial; typically, a 3:1 ratio of flour to water yields a dough that is manageable and not overly wet or dry.
Once the ingredients are combined, begin the kneading process, which is essential for developing gluten, the protein responsible for the dough’s elasticity and structure. Knead the dough for about 8 to 10 minutes on a lightly floured surface until it becomes smooth and elastic. If the dough feels excessively sticky, add small amounts of flour as needed, but be cautious not to overdo it, as too much flour can result in a dense crust.
During the kneading phase, consider infusing additional flavors, such as herbs or spices, to give the dough a unique character. Once the dough reaches your desired consistency, place it in a greased bowl, cover it with a damp cloth, and let it rise until it has doubled in size. This fermentation phase is essential; it develops flavors and improves the texture of the dough, resulting in a delightful base for your pizza.
Shaping Your Dough for a Perfectly Even Pizza Base
Once your dough has successfully risen, the next step is to shape it into the ideal pizza base. Here is where your creativity can truly flourish. Gently punch down the dough to release air bubbles, then divide it into portions according to the size of the pizzas you intend to create.
When shaping, you can either roll out the dough with a rolling pin or stretch it by hand. If you opt for the latter, start from the center and work your way outward, allowing gravity to assist in the process. The goal is to achieve an even thickness, ideally around 1/4-inch, while ensuring the edges remain slightly thicker for a delightful crust.
Be mindful of your pizza stone's dimensions when shaping the dough, as it should match the stone’s size to ensure even cooking. A well-shaped dough not only enhances the visual appeal of your pizza but also significantly influences its cooking process. Uneven thickness can lead to areas that are undercooked or overcooked, detracting from the overall enjoyment.
As you shape the dough, feel free to add toppings directly onto the unbaked base to visualize how your pizza will look. This practice can inspire creativity in topping combinations, ensuring a balanced distribution of flavors across your pizza.
Proofing Your Dough for an Ideal Texture
Proofing, or allowing the dough to rise a second time, is a vital step in achieving a light, airy texture while developing rich flavors. After shaping, allow the dough to proof for a final rise, typically lasting between 1 to 2 hours at room temperature. This stage enhances the dough's flavor profile and contributes to that quintessential pizzeria texture.
Alternatively, for those seeking a more robust flavor, consider placing the shaped dough in the fridge overnight. Cold fermentation enables complex flavors to develop, resulting in a more nuanced dough that reflects the traditional practices found in pizzerias worldwide. This method, often favored by professional bakers, not only enhances the crust but also improves the dough's handling characteristics.
As the dough proofs, monitor its expansion; it should noticeably grow. Keep it covered with a damp cloth or plastic wrap to prevent drying out. This technique retains moisture and promotes a healthier rise.
Once the dough has doubled in size, it is ready to be prepared for the stone. This final proofing stage is where the magic happens and should never be rushed. The patience you invest at this stage will reward you with a delicious, airy crust that is truly spectacular.
Preparing Your Dough for Successful Use on the Pizza Stone
Before placing your pizza on the hot stone, it is crucial to prepare the surface to prevent sticking. Lightly dust your pizza stone with cornmeal or semolina, creating a non-stick barrier while adding a slight crunch to the bottom of your pizza. This technique is widely practiced by professional pizza makers and is essential for effectively mastering the use of a pizza stone at home.
Once the stone is prepared, carefully transfer your shaped dough onto a pizza peel or an inverted baking sheet that has been dusted with flour or cornmeal. This method facilitates a smooth slide onto the stone without compromising the dough's integrity. If you lack a peel, improvisation is possible, but take care to maintain the dough’s shape during the transfer.
Ensure your toppings are ready and arranged on the pizza to avoid overcrowding, which can lead to a soggy outcome. The key to a successful pizza is achieving balance; toppings should complement rather than overwhelm the base. By properly preparing the dough and utilizing a hot pizza stone, you set the foundation for a delicious culinary experience that brings the authentic flavors of Italy right to your home.
Mastering the Techniques of Topping and Cooking Your Pizza to Perfection
Evenly Spreading Sauce and Strategically Arranging Toppings for Maximum Flavor
One of the most exhilarating aspects of mastering pizza stone use at home is the art of topping your pizza. Start by evenly spreading your chosen sauce across the dough, making sure to leave a border for the crust. The sauce should enhance your ingredients without overpowering them; consider using homemade tomato sauce, pesto, or even a white sauce for a unique twist on tradition.
When selecting toppings, remember that less is often more. Overloading your pizza can lead to a soggy mess, hindering that perfect crust from forming. Instead, adopt a balanced approach by utilizing fewer high-quality ingredients. For instance, a classic Margherita pizza typically features fresh mozzarella, basil, and a drizzle of olive oil, while a gourmet option might include toppings such as prosciutto, arugula, and truffle oil for an elevated culinary experience.
The order in which you layer your toppings also plays a significant role; start with cheese to create a protective layer that prevents the base from absorbing excess moisture. Then, add your meats and vegetables. Vegetables with high water content, like tomatoes and mushrooms, should be pre-cooked or applied sparingly to avoid excess moisture during baking.
Feel free to experiment with flavors from various cuisines to elevate your pizza-making skills. Consider globally-inspired toppings, such as tandoori chicken or Greek feta, to create a unique culinary fusion on your stone. The possibilities are endless, allowing you to tailor each pizza to your tastes and culinary adventures, ensuring every bite is a delightful experience.
Carefully Transferring Your Pizza to the Stone for Even Cooking
Transferring your assembled pizza to the preheated stone requires steady hands and a bit of finesse. Using your pizza peel or an inverted baking sheet, gently slide the pizza onto the stone, ensuring there are no hiccups that could compromise your culinary masterpiece. A quick, confident motion is essential; any hesitation may lead to sticking or misalignment.
If you encounter any sticking, remain calm. A spatula can help nudge the pizza free without damaging the base. After positioning the pizza, promptly close the oven door to maintain the high temperature required for proper cooking.
As the pizza bakes, watch it closely through the oven window. The intense heat from the pizza stone will begin to work its magic, crisping the base while melting and browning the cheese. This is the moment where anticipation builds as you envision that perfect slice ready to be enjoyed.
Be mindful of your cooking time, which typically ranges from 10 to 15 minutes, depending on your oven and the thickness of the dough. Key indicators of a perfectly cooked pizza include a golden-brown crust and bubbling cheese. If you notice the crust browning too quickly, consider rotating the pizza halfway through for even cooking, resulting in a delightful, uniformly baked treat.
Understanding Cooking Time and Temperature for Impeccable Pizza Results
Achieving the ideal pizza requires a thorough understanding of cooking time and temperature. When exploring how to use a pizza stone at home, setting your oven between 230 °C and 260 °C ensures that your pizza cooks quickly, resulting in a crispy crust while preserving the vibrant and flavorful toppings.
Typically, a cooking time of 10 to 15 minutes will suffice, but this can vary based on the thickness of your crust and the toppings you choose. Thicker crusts may need a few extra minutes, while thin crusts might finish more quickly. It’s essential to keep a close eye on the pizza during the final moments of cooking, as the margin between perfect and burnt can be quite narrow.
An oven thermometer can be invaluable in this situation. Relying solely on standard oven settings may introduce subjectivity, and an accurate reading will help you refine your technique for consistent results.
As your pizza nears completion, pay attention to the bubbling cheese and the delightful aroma wafting through your kitchen; these sensory cues will guide you to the right moment for removal. Once you achieve that golden crust and melted perfection, carefully extract the pizza from the oven using your peel or a spatula, allowing it to cool briefly before slicing into this delicious creation.
Essential Maintenance Practices for Your Pizza Stone
Cleaning Your Stone After Each Use for Longevity and Quality
Proper maintenance of your pizza stone is critical for ensuring its longevity and optimal performance, particularly when learning how to use a pizza stone at home. After cooking, allow the stone to cool completely before attempting to clean it; cleaning a hot stone can lead to thermal shock and potential cracking.
Once cooled, gently use a spatula to scrape off any stuck-on food. This step is vital for preserving the stone’s surface and ensuring it is ready for your next baking session. For stubborn residue, a soft brush can effectively dislodge remnants without damaging the stone.
A damp cloth can be utilized to wipe down the surface, but refrain from using soap or soaking the stone in water. The porous nature of the stone means it can absorb these substances, leading to undesirable flavors in your future pizzas. Regular cleaning after each use will keep your pizza stone in prime condition, enhancing your overall pizza-making experience.
Consider how frequently you use your stone; the more often you bake, the more crucial it is to maintain a consistent cleaning routine. By integrating these practices into your regimen, you’ll ensure that your pizza stone remains a reliable tool in your kitchen arsenal, always ready to deliver perfect pizzas time and again.
Preventing Damage to Your Pizza Stone for Optimal Usage
When learning how to use a pizza stone at home, understanding how to prevent damage is paramount. The stone is designed to withstand high temperatures, but improper handling or maintenance can lead to cracks and deterioration.
Always handle the stone with care; dropping it or exposing it to drastic temperature changes can cause it to crack. When storing your pizza stone, choose a dry location to prevent moisture buildup, which could compromise its structural integrity. If your stone becomes damp, allow it to air dry thoroughly before using it again.
Avoid using metal utensils on the stone's surface, as they can scratch and damage the material. Opt for wooden or silicone tools when working with your pizza stone to maintain its quality and longevity. By adopting these straightforward yet effective practices, you can ensure your pizza stone remains in pristine condition, ready to create artisanal pizzas for years to come.
Optimal Storage Techniques for Your Pizza Stone
Proper storage plays a significant role in the longevity of your pizza stone. After cleaning, ensure that the stone is completely dry before putting it away. Moisture can lead to mold growth or cracking during subsequent uses, undermining your efforts to master using a pizza stone at home.
Store your pizza stone flat, rather than on its side, to avoid undue pressure that could lead to fractures. If space allows, keep it in a designated area in your kitchen where it won’t be jostled by other kitchenware. Some enthusiasts even opt to keep their stones in the oven, providing the dual benefit of easy access and additional thermal mass, which can enhance oven performance.
Maintaining your stone in optimal conditions will ensure it remains a dependable companion on your pizza-making journey. With proper care, your pizza stone will continue to produce perfectly cooked pizzas, offering an authentic taste experience that rivals your favorite pizzeria.
Troubleshooting Common Issues with Your Pizza Stone
Addressing Cracks in Your Pizza Stone for Continued Use
Cracks in your pizza stone can be disheartening, especially after investing time in mastering the art of using a pizza stone at home. However, it is essential to recognize that minor cracks are often normal and will not significantly affect the stone’s performance. These small fissures are typically cosmetic and can occur due to rapid temperature fluctuations or prolonged use.
If you notice larger cracks, it may be time to consider replacing the stone. While small cracks won’t impede functionality, larger ones can disrupt heat distribution and lead to uneven cooking. Regularly inspecting your stone can help you identify potential issues early, allowing for timely intervention and prevention.
To minimize future cracking, ensure that you allow the stone to cool gradually before cleaning, as sudden temperature shocks are a primary cause of damage. Additionally, maintaining consistent care practices will prolong the life of your stone, enabling it to continue delivering delicious pizzas.
Preventing Pizza from Sticking to the Stone for Effortless Removal
Sticking can be a frustrating challenge when exploring how to use a pizza stone at home. When your pizza adheres to the stone, it can result in an unsightly mess and a disappointing cooking experience. To prevent sticking, always remember to generously dust the stone with cornmeal or semolina before placing your dough onto it. This creates a barrier that allows for easy sliding during the transfer and encourages a delightful crunch on the crust.
Additionally, ensure that your dough is well-floured during shaping. If the dough is too sticky, it can adhere to the stone, complicating removal. Use flour liberally during the shaping process, but be cautious not to overwork the dough, as this can affect its final texture.
If you do encounter a sticking issue, a gentle nudge with a spatula can help release it without damaging the pizza. By implementing these strategies, you can enjoy a hassle-free pizza experience, allowing you to focus on the delightful toppings and flavors that make each pizza unique.
Perfecting Your Pizza Crust for Restaurant-Quality Results
Achieving a flawless crust is the ultimate goal of pizza-making, and understanding the key elements can help you master how to use a pizza stone at home. The first and most crucial factor is ensuring your oven is fully preheated, along with the pizza stone. This step is vital, as a hot stone provides the instant heat necessary to create that coveted crispy bottom while retaining moisture in the toppings.
Another critical aspect is the dough itself. A well-made dough should have the right balance of ingredients, allowing for elasticity and structure. This balance ensures that your crust rises adequately during cooking, resulting in the perfect airy texture you desire.
Consider experimenting with different cooking times and temperatures based on your preferences. Some may prefer a slightly softer crust, while others enjoy a robust crunch. A good practice is to monitor the pizza closely, observing the crust's color and texture as it cooks.
By honing these techniques and paying attention to detail, you can achieve a crust that rivals those found in traditional pizzerias, bringing the authentic taste of Italy directly to your home kitchen.
Managing Uneven Heating in Your Oven for Consistent Pizza Results
Uneven heating can lead to disappointments when creating pizzas, especially when navigating how to use a pizza stone at home. If you find that certain areas of your pizza are cooking faster than others, rotating your pizza halfway through the cooking time is crucial. This practice ensures even heat distribution, allowing every part of your pizza to receive equal treatment.
It’s also vital to ensure that your oven is functioning correctly. An oven thermometer can help diagnose temperature inconsistencies, enabling you to adjust your cooking times accordingly. If your oven has hot spots, consider using a pizza stone with a thicker base, as it can help regulate temperature more effectively.
Regular maintenance of your oven can also contribute to even heating. Periodically clean the oven to remove food residue and grease, maintaining efficient airflow and heat distribution, ensuring every pizza comes out perfectly cooked. By incorporating these strategies, you’ll be well on your way to achieving pizza perfection in your kitchen.
Keeping Your Pizza Stone Clean and Well-Maintained for Longevity
Maintaining the cleanliness of your pizza stone is essential for preserving its quality and ensuring each pizza is as delicious as the last. After every use, allow the stone to cool completely before cleaning. This critical step prevents thermal shock and potential cracking.
Once cooled, use a spatula or scraper to gently remove any stuck-on food. A stiff brush can help dislodge stubborn bits, but avoid using soap or soaking the stone in water. The porous nature of the stone can absorb these substances, affecting future flavors in your pizzas.
For persistent stains, consider gently scrubbing the area with a damp cloth, but ensure the stone is thoroughly dry before storing it. Regular cleaning will help maintain the stone's performance and enhance your overall pizza-making experience, ensuring that you can consistently create perfect pizzas.
Exploring Innovative Pizza Recipes and Flavor Combinations
Diving into Unique Flavor Profiles for Your Pizza Creations
One of the most exhilarating aspects of mastering how to use a pizza stone at home is the opportunity to experiment with various recipes and flavor combinations. Beyond traditional pizzas, consider venturing into gourmet toppings or alternative bases. For example, a dessert pizza featuring Nutella, fresh fruits, and a sprinkle of icing sugar can provide a delightful end to a meal, showcasing the versatility of your pizza stone.
Incorporating globally inspired toppings can also elevate your pizza-making game. Imagine a Thai-inspired pizza with peanut sauce, shredded chicken, and fresh cilantro or a Middle Eastern twist featuring lamb, tzatziki, and roasted vegetables. The possibilities are endless, and each recipe can reflect the diverse culinary influences from around the world.
Moreover, don’t shy away from using alternative flours, such as chickpea or cauliflower, to create gluten-free bases that appeal to a broader range of dietary preferences. This experimentation allows you to tailor your creations to accommodate various tastes and dietary needs, making your pizza nights even more inclusive and enjoyable for everyone.
Innovating by Combining Unique Ingredients for Extraordinary Pizzas
Embracing creativity is essential when exploring how to use a pizza stone at home. Combining unexpected ingredients can lead to delightful surprises. For instance, consider blending gourmet cheeses like gorgonzola with traditional mozzarella for a rich flavor profile, or incorporate seasonal vegetables to enhance freshness and taste.
Experimenting with different sauces can also add depth to your pizza. Instead of the classic tomato sauce, try using pesto, barbecue sauce, or even a drizzle of balsamic glaze to elevate your dish and surprise your guests.
Engaging with local markets can inspire your pizza toppings. Seasonal produce not only enhances flavor but also supports local agriculture, making your pizza experience both delicious and community-focused. By sourcing fresh ingredients, you can create pizzas that are not only satisfying but also celebrate the diversity of global cuisines.
Creating Memorable Experiences with Interactive Pizza Nights
Consider hosting a pizza night as a fun and interactive way to explore how to use a pizza stone at home. Invite friends and family to join in on the culinary adventure, providing a variety of doughs, sauces, and toppings for everyone to create their unique masterpieces.
This communal experience encourages creativity and collaboration, with guests sharing their flavor combinations and techniques. You could even set up a mini-competition for the best pizza, motivating everyone to step out of their comfort zones and try new ideas.
Hosting a pizza night not only creates memorable experiences but also fosters a sense of community around cooking and sharing food. By embracing this tradition, you’ll find that making pizzas becomes not just a process but a celebration of culture and collaboration, enhancing your culinary journey.
Frequently Asked Questions About Using a Pizza Stone
Can I use any oven with a pizza stone?
Yes, you can utilize a conventional oven or even a grill. However, ensure that the oven can reach high temperatures for optimal cooking results.
How do I know when my pizza is fully cooked?
Your pizza is done when the crust is golden brown, the cheese is bubbling, and the toppings appear cooked but not burnt, indicating perfect readiness.
Is it safe to wash my pizza stone with soap and water?
No, avoid using soap, as the stone is porous and can absorb it. Instead, clean with a dry brush or scraper to maintain quality.
What distinguishes a baking stone from a pizza stone?
While both serve similar purposes, pizza stones are generally thicker and specifically designed to withstand high temperatures and absorb moisture more effectively.
What can I do if my pizza dough keeps sticking to the stone?
Ensure your dough and the pizza stone are well-floured. Consider dusting with cornmeal or semolina to create a non-stick surface, preventing sticking.
What is the expected lifespan of my pizza stone?
With proper care, a pizza stone can last many years. Regular cleaning and avoiding thermal shock will significantly contribute to its longevity.
Can I place frozen pizza directly on a pizza stone?
Yes, you can place frozen pizza directly on the preheated stone. Adjust cooking times accordingly based on the pizza's size and thickness for optimal results.
Can I use my pizza stone for baking bread?
Absolutely! A pizza stone is excellent for baking bread as it helps create a crispy crust due to even heat distribution, enhancing the baking process.
How do I re-season my pizza stone?
You don’t need to season your pizza stone. Please keep it clean and dry after each use to maintain its surface and performance.
What should I avoid placing on my pizza stone?
Avoid using metal utensils, immersing them in water, or applying soap, as these actions can damage the stone and affect its functionality.
Connect with us on Facebook!
The post How to Use a Pizza Stone at Home: A Simple Guide appeared first on https://cookinggods.com
The Article Using a Pizza Stone at Home: Your Simple Guide Was Found On https://limitsofstrategy.com
No responses yet